Cartridge configuration
This page explains how to implement the Purse Identity cartridges with your Salesforce Commerce Cloud (SFCC) setup. This tutorial outlines the SRFA cartridge, but the steps are generally the same for SiteGenesis.
The configuration on this page handles the general configuration for the cartridges. For specific use cases, see Configuration use cases.
Prerequisites
-
You must have access to the Purse Identity Console.
-
You must have a SalesForce Commerce Cloud account.
-
You must be able to access the Purse Identity SFCC cartridges on GitHub.
-
You’ll likely need the SalesForce authenticator app when logging into your SFCC account.
First steps
The first thing you need to do is import the latest Purse Identity cartridges into your SFCC project and import the preferences and metadata. After you successfully import the cartridges, we’ll move on to configuring what you need to do in your SFCC project and in the Purse Identity Console.
Let’s get started.
-
Go get the Purse Identity cartridges from GitHub. You’ll need the
int_reachfiveandint_reachfive_sfrafor this tutorial.You can download the files directly from the root of the repository. -
Add the cartridges to a directory in your project.
-
Go to the directory
Metadata/site_template.-
Download and zip this folder so that it saves as
site_template.zip.
-
-
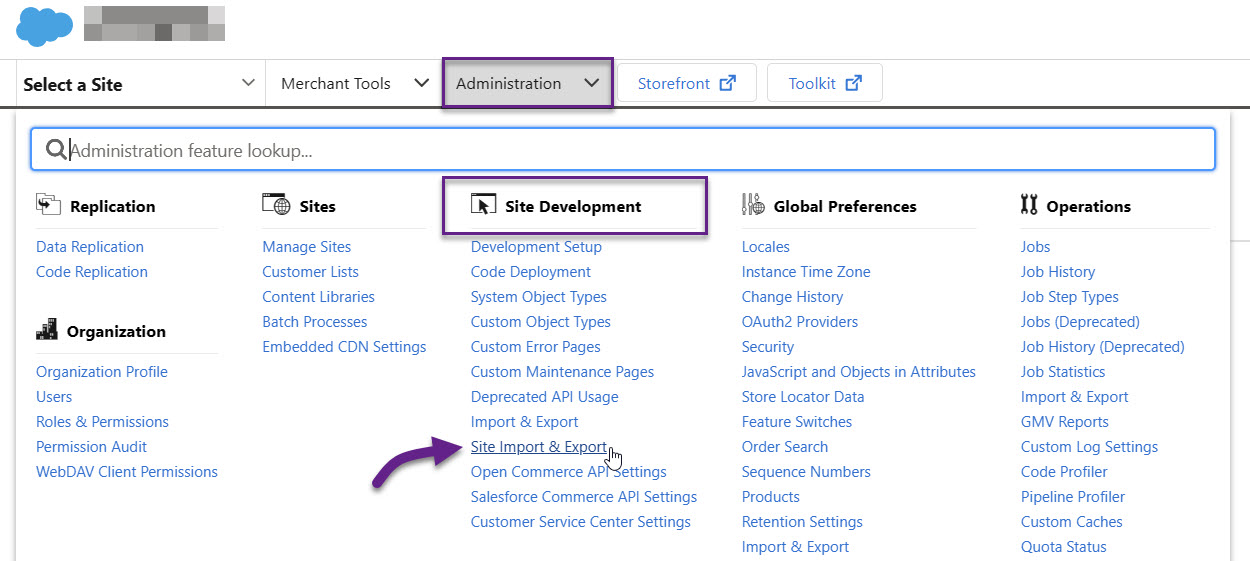
Now, go to your SFCC Business Manager account.
-
Navigate to .
-
Upload the
site_template.zipfile.
Configure SFCC
You’ll need to input some Purse Identity values in your SFCC dashboard after you have uploaded the cartridges.
The main steps are:
-
updating cartridges in your site settings
-
configuring custom preferences for your Purse Identity cartridge
Update cartridge in site settings
From your SFCC Business Manager dashboard:
-
Go to .
-
Select your desired site.
-
Go to the Settings tab.
-
Where it says Cartridges, append the following:
int_reachfive_sfra:app_storefront_base:int_reachfive -
Click Apply.
Configure custom preferences
There are some baseline custom preferences needed for your cartridge depending on the mode (Social Login, Transition, or Full CIAM). These are covered here.
Configure these preferences in your SFCC Business Manager dashboard at .
| The preferences here are the basic, baseline preferences. For more custom preferences, such as splitting names for Korean language users or setting up biometrics and passkeys, see Configuration use cases. |
| Social Login | Transition | Full CIAM | |
|---|---|---|---|
SFCC Preferences |
|||
|
|||
|
|||
|
|||
|
|||
Purse Identity |
|||
Identity Client |
|||
Management Client |
|||
SSO |
|||
Social providers |
|||
Email provider and templates |
|||
Configure Purse Identity
Now that you have imported the cartridges into your project and the metadata and preferences (site_template.zip) into your SFCC Business Manager account, we can look at what we need to do from the Purse Identity side of things.
| You’ll need to copy and paste the Client ID and Client secret for both the Identity and Management clients into your SFCC’s custom preferences, so be sure to take note of those. You can always come back to the Purse Identity Console to get these any time you need. See Retrieve client credentials for more details. |
In this section, you will:
Set up Purse Identity clients
You need to set up and configure both the Identity and Management clients.
Identity Client
-
Go to your Purse Identity Console. This could be staging or production. For example purposes, we’ll use the staging Purse Identity Staging Console.
-
Go to .
-
Select New client.
-
Give the client a name and select the Client type (Identity in this case) from the dropdown menu. Don’t forget to Save your input.
-
Follow the instructions to create or edit an Identity Client on the Clients page and ensure the following values are added where noted:
Field Value Scopes
-
openid
-
profile
-
full_write
Token Endpoint Authentication Method
Post
Allowed Origins (CORS)
https://{domain}
Where
{domain}is your SFCC domain.Allowed Callback URLs
-
https://{domain}/on/demandware.store/Sites-RefArch-Site/en_US/Login-Show
-
https://{domain}/on/demandware.store/Sites-RefArch-Site/en_US/ReachFiveController-CallbackReachFiveRequest
Where
{domain}is your SFCC domain.Token lifetime (seconds)
86400
Disabled implicit flow
Yes
Enforced PKCE
No
Enable Refresh Tokens
No
JWT Algorithm
HS256
Login URL
https://{domain}/on/demandware.store/Sites-RefArch-Site/en_US/Login-Show
Where
{domain}is your SFCC domain. -
Management Client
-
Go to your Purse Identity Console. This could be staging or production. For example purposes, we’ll use the staging Purse Identity Staging Console.
-
Go to .
-
Select New client.
-
Give the client a name and select the Client type (Management in this case) from the dropdown menu. Don’t forget to Save your input.
-
Follow the instructions to create or edit a Management Client on the Clients page and ensure the following values are added where noted:
Field Value Permissions
-
manage:users
-
read:users
Allowed IP address
Token Endpoint Authentication Method
Post
Allowed Origins (CORS)
https://{domain}
Where
{domain}is your SFCC domain.Token lifetime (seconds)
86400
Disabled implicit flow
Yes
Enforced PKCE
No
JWT Algorithm
HS256
-
Authorise SFCC backend IP
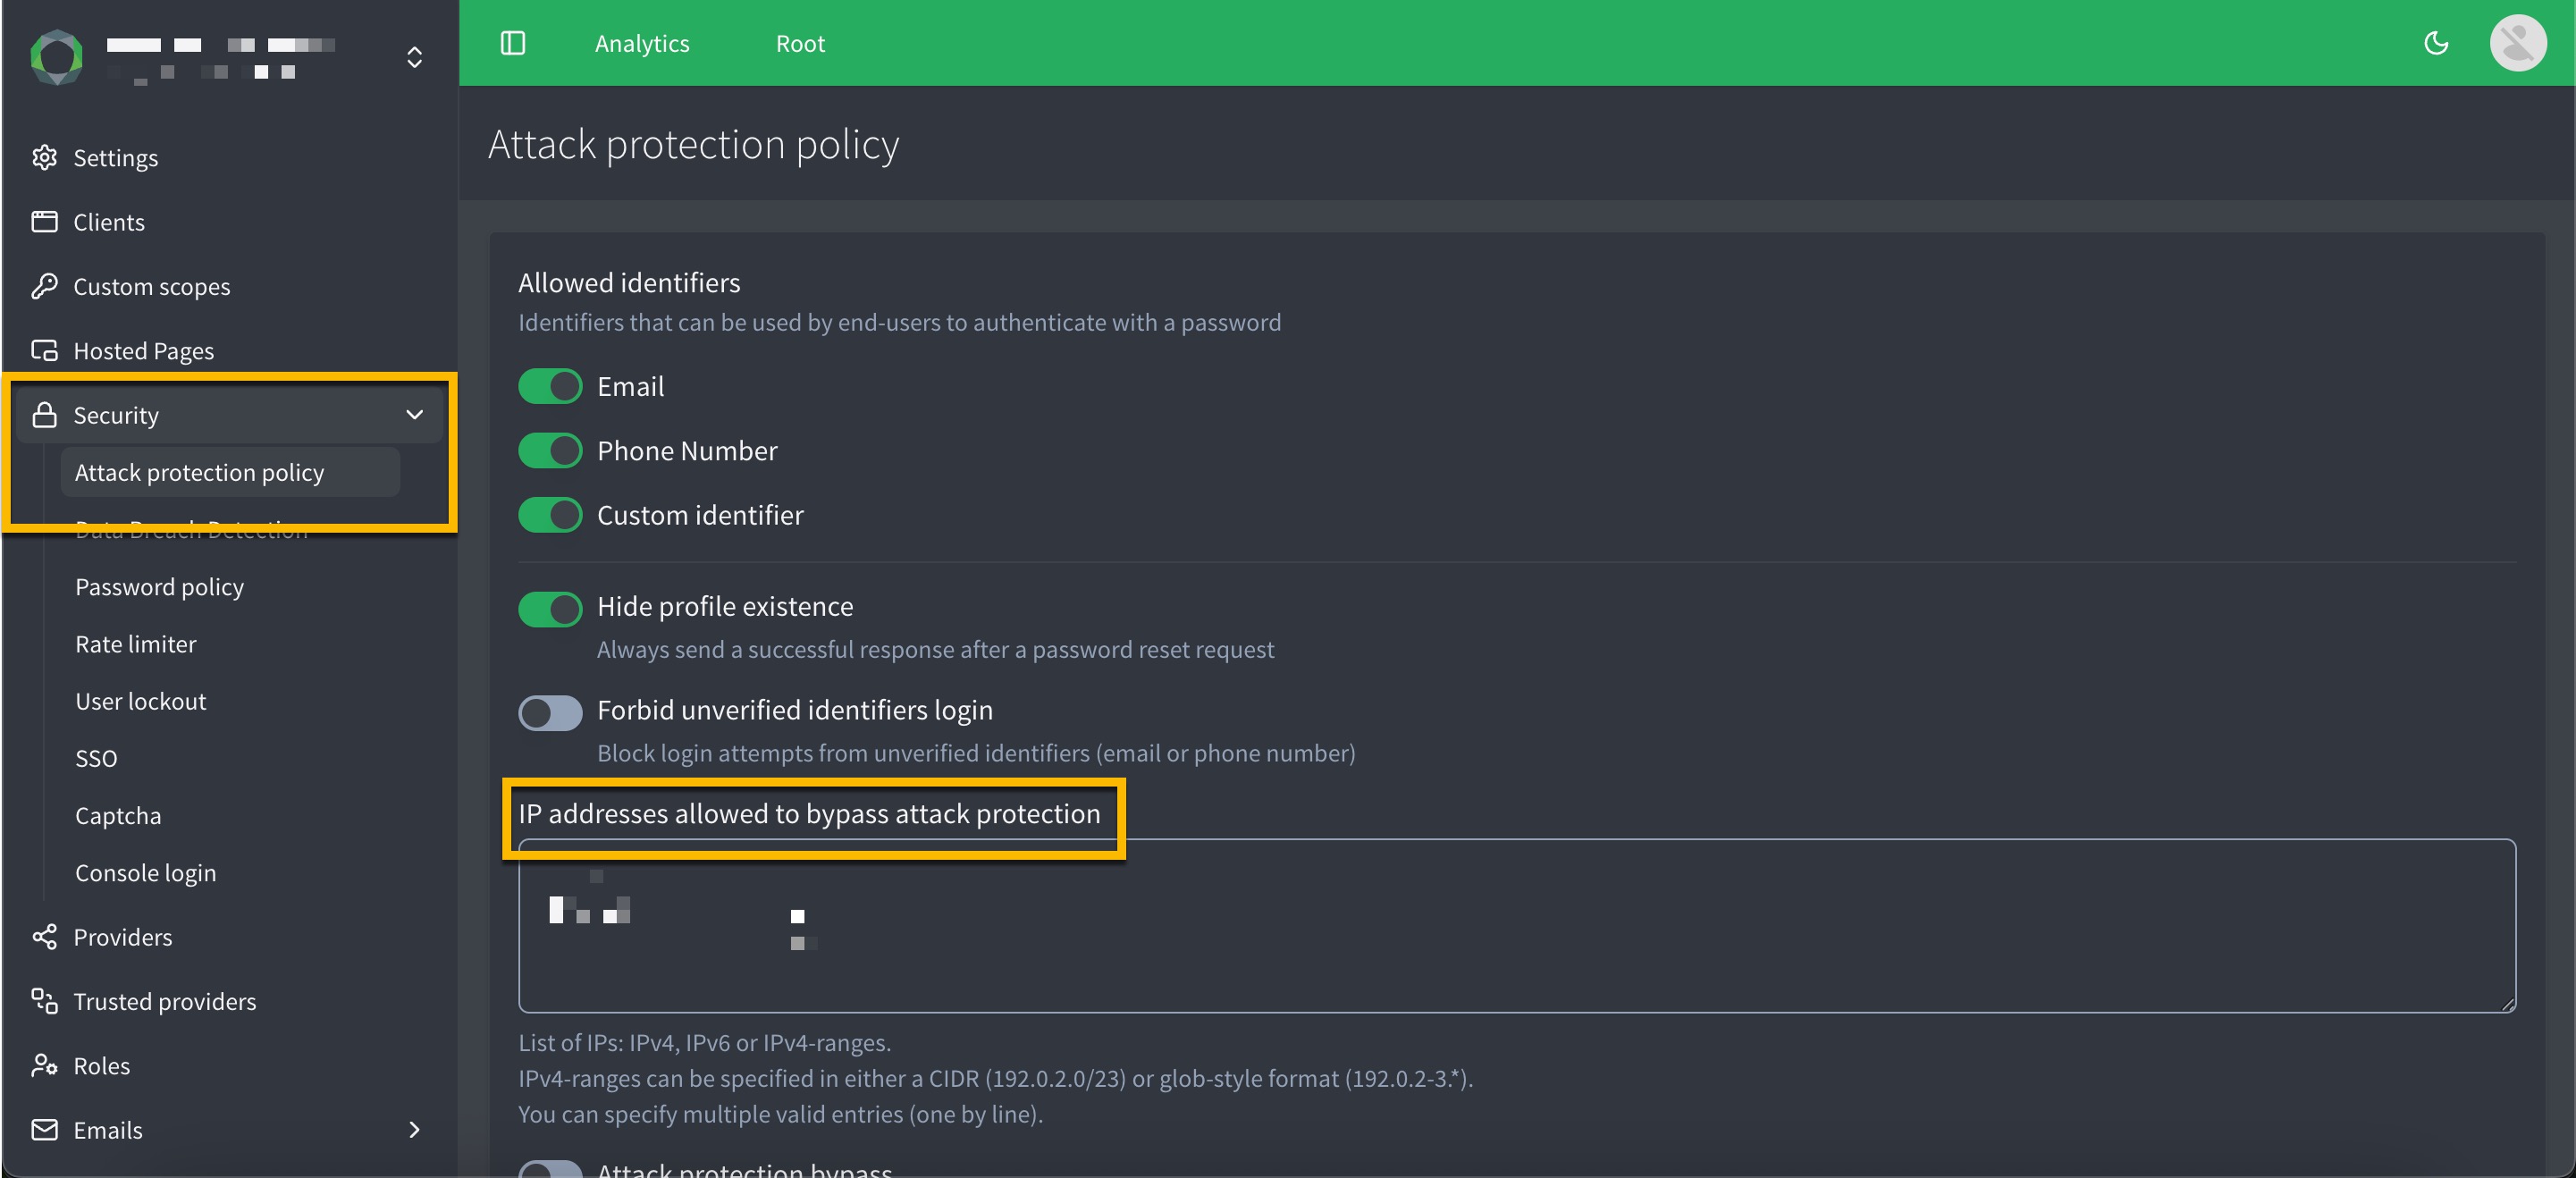
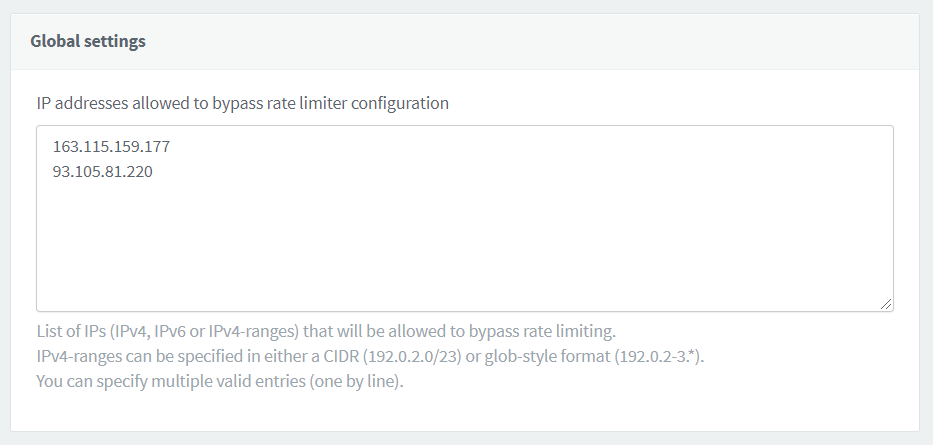
Some API calls are made by the SFCC backend IP. If left unauthorised, Purse Identity security protocol will block the IP address through our Identity Fraud Protection and Rate limiting features.
In order to ensure the SFCC backend IP is able to make the calls successfully, you must whitelist the IP to bypass attack protection and rate limiting security policies.
You can do this in the Purse Identity Console.
-
Log in to your Purse Identity Console.
-
Go to .
-
Add the IP addresses allowed to bypass attack protection. This can be a single IP address or a range in CIDR notation. Enter one per line.
-
Don’t forget to Save your input.
-
Go to .
-
Under Global settings, list one URL per line.
-
Don’t forget to Save your input.
Purse Identity cartridge integration tips
Here, we provide you with useful tips related to integrating the Purse Identity Salesforce cartridge.
Logout
In order to ensure the logout function works successfully, your logout button must be a link.
The link must end with Login-Logout.
const URLUtils = require('dw/web/URLUtils');
function logoutFunction(req, res, next) {
    const logoutUrl = URLUtils.https('Login-Logout'); // Generate secure URL
    res.render('your_template', { logoutUrl: URLUtils.https('Login-Logout') }); // Pass it to the ISML template
    return next();
}
module.exports = logoutFunction;
<a class="button" href="${pdict.logoutUrl}">Logout</a>